
Every once in a while, I just HAVE to create a card that is a bit more detailed and takes a bit more time to create. But, when it is done, I am so satisfied with my creation I can't wait to send it off to someone special!
This card, created with the Poppy Moments dies is elegant all on its own without using the stamp set that coordinates with it. I found that using our Adhesive Sheets is really the easiest way to adhere the white outline layer of the flowers.
All you need to do is add an Adhesive Sheet to one side of the White Cardstock. Keep the adhesive side DOWN on the cutting surface, add the die on top of the cardstock, run it through the machine, peel off the adhesive backing and adhere onto the top of the die cut poppy.

I did use a liquid glue for the leaves and other flowers because there is enough surface to work with.
I actually created both of these cards at the same time because I used 'leftover' pieces on each of them.
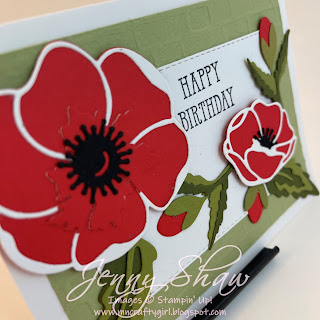
The picture above shows a white stitched rectangle sitting on top of an Old Olive Brick and Mortar embossed layer on top of a white card base.
The card below, I used the outside frame left over from the stitched rectangle on the card above to create a window. I've added dimensionals around the edge of the window to pop it out. Same flower techniques just different layers for a different look.


Not sure if anyone else does this, but I can never make just ONE card at a time. I am usually making 2 to 4 cards at once. I figure if I am already playing with a design or papers, I might as well create a couple, so I don't have as many scraps to put back into my stash.
How many cards to you create at a time when you are stamping? Do you send them all out or do you keep one as a base for other ideas the next time you stamp?
Don't forget, you can order any of these items or other items from either catalog or
the clearance list from my store. Click HERE to shop today!
Product List
 |  |  | ||
 | ||||
 |  |  |  |
")


No comments:
Post a Comment